The 3-Step Gum-Care Routine Kansas City Patients Actually Stick With

At State Avenue Dental Office, I've watched thousands of patients transform their gum health—not through miracle products, but by finally understanding why the order matters.
If you're seeing pink in the sink or dealing with that metallic taste, here's the sequence that's worked for our patients over the past two decades. Most notice real improvement within 10–14 days.
Why This Sequence Works (When "Just Floss More" Doesn't)
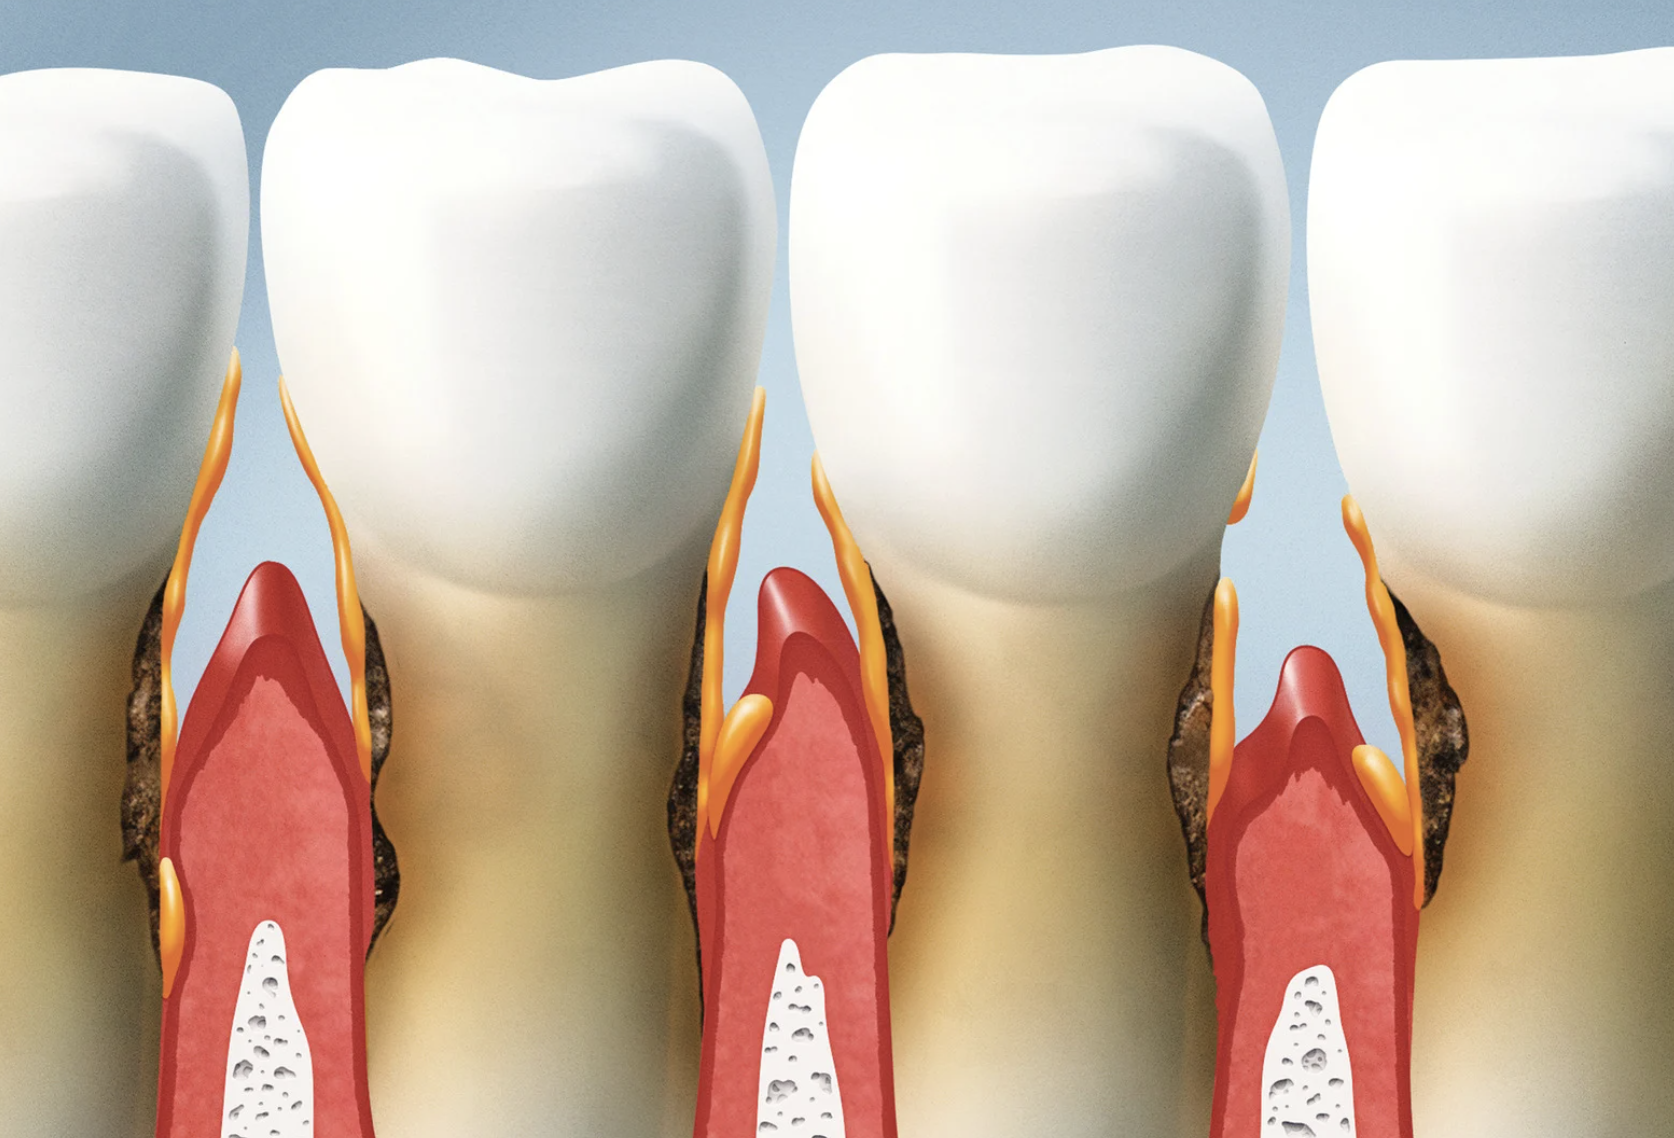
After 20 years in dental marketing and patient education, I've learned this: plaque isn't a flat film you can just wipe away. It builds up in layers, wraps around irregular surfaces, and loves hiding in the spaces your toothbrush can't reach.
When you dislodge debris first, clean contact points second, and flush everything away third, you're working with your mouth's anatomy instead of against it.
Step 1: Interdental Brush (Your Debris Lifter)
Think of this as prep work. You're loosening the packed-in food particles and biofilm before the real cleaning begins.
What works:
Choose a size that slides in with gentle pressure—if you're forcing it, go smaller
Front teeth typically need 0.4–0.6mm; molars often need 0.7–0.9mm
Insert straight in, wiggle gently back and forth 3–4 times
Replace when bristles look bent (usually every 1–2 weeks)
For implant patients: Metal cores are generally fine, but if you have sensitivity or your dentist in Kansas City, Kansas recommends it, coated or rubber-core options work beautifully around titanium posts.
Step 2: Floss (Your Contact Point Specialist)
Here's what most people miss: interdental brushes can't squeeze into those tight contact points where your teeth actually touch. That's floss territory.
Proper technique:
Wrap into a "C" shape around each tooth—you're hugging the curve
Slide up and down 3–5 gentle strokes per side
Use a fresh section for each space (sounds fussy, but it actually matters)
For bridges or permanent retainers: floss threaders or super floss are your friends
I tell patients this: if you only have 60 seconds at night, floss the back molars. That's where 70% of gum disease starts.
Step 3: Water Flosser (Your Finisher and Implant Guardian)
This isn't optional if you have dental work. Water flossers excel at flushing bacteria from places your hands simply can't reach—around implants, under bridges, and in those deeper gingival grooves.

Smart usage:
Angle the tip along the gumline, not straight into pockets (you're irrigating, not pressure-washing)
Start at pressure level 3–4; work up to 7–8 as your gums toughen up
Spend 2–3 seconds per tooth, especially around restorations
Do this after the interdental brush and floss have cleared the big debris
Then Brush with Fluoride (The Essential Closer)
Two minutes, twice daily:
Soft-bristled brush at a 45° angle to your gumline
Small circular motions, not side-to-side scrubbing
Fluoride toothpaste strengthens enamel and helps reverse early decay
Don't rinse aggressively afterward—let that fluoride sit on your teeth for a few minutes.
The Two-Week "Bleeding Downshift" Protocol
This is what I walk new patients through:
Week 1: Do the full 3-step combo (interdental brush → floss → water flosser) once daily, preferably at night. Your gums might be tender at first—that's normal.
Week 2: Add a quick morning pass with either the interdental brush or floss. You don't need the full routine twice daily, but that second touch makes a difference.
By Day 10–14, most patients report:
Noticeably less bleeding when brushing
Fresher breath (that sulfur smell drops off)
Smoother, cleaner-feeling teeth
If you're not seeing improvement, there's usually calculus (tartar) below the gumline or early pocket formation—things we need to address in the office.
Special Considerations for Implants and Braces
Dental implants: Water flossers and interdental brushes are your MVPs. Implants don't get cavities, but peri-implantitis (implant gum disease) is real and can cause bone loss. Use implant-safe brush tips if your hygienist recommends them.
Orthodontics: Threader floss gets under the wire; water flossers blast away particles around brackets. This combo has saved countless patients from the dreaded "white spot" scars after braces come off.
Your Next Step: Let's Customize This for Your Mouth

If you've been doing these steps consistently for two weeks and still seeing bleeding, bad breath, or gum soreness, it's time to look deeper. You might have calculus buildup below the gumline, early pocket formation, or even a bite issue that's creating pressure points.
At State Avenue Dental Office, we don't believe in one-size-fits-all recall schedules. Depending on your gum health, home routine, and dental work, we might recommend cleanings every 3, 4, or 6 months.
Ready to dial in your personalized gum-care plan? Give us a call at State Avenue Dental Office. We'll check what's actually going on under your gumline and help you build a routine that fits your real life—not some textbook ideal.
Your gums don't have to bleed. Let's figure out why they are.